Skip to content

www.rolfje.com

Category: Workshop

Lathe Spindle rebuild, part 1

Posted on 2007-08-28 By rolfje 2 Comments on Lathe Spindle rebuild, part 1

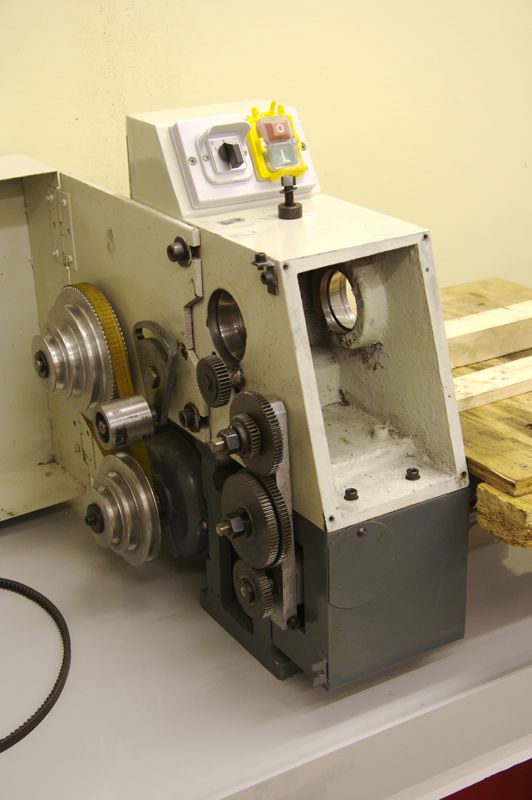
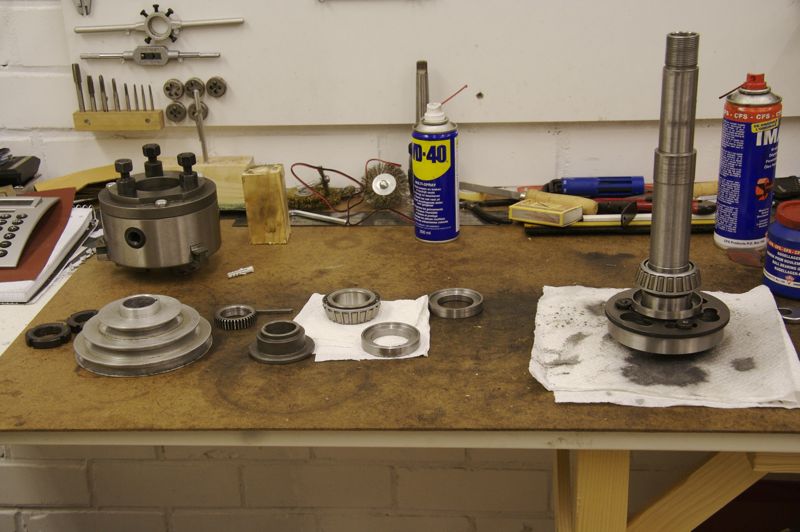
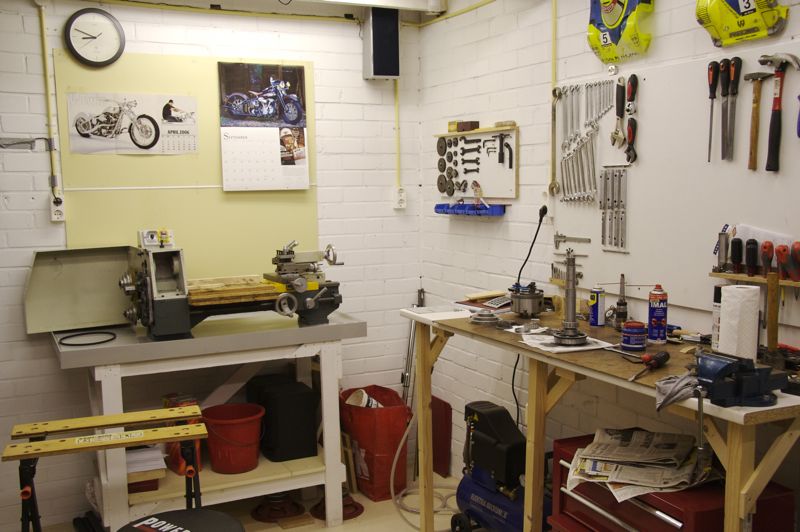
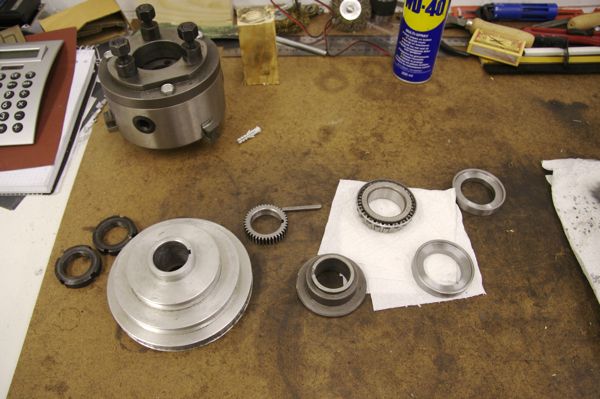
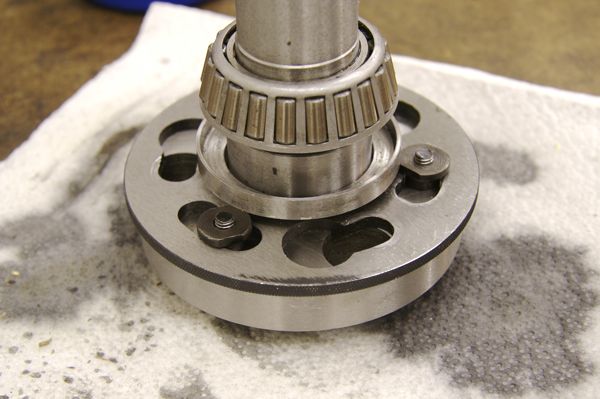
o_img_7615.jpgPast few weeks I noticed that the spindle bearings of my lathe were becomming warmer than I liked, particularly when working with higher rpm. Last weekend I decided to take the spindle out, clean the old grease out, and rebuilding it. It turned out to be more work than I expected. The tight fit of the pully made me use the hammer-and-wood trick on the spindle, which I did not like. After a few hours of tapping and fiddling, the pully came of. The spindle gear and the left hand bearing were no fun job either.

Anyway, the whole thing is apart now, and I cleaned out all the grease. I test-fitted the spindle sundaynight, but I can feel a slight “bump” when turning it, I think the grease must have picked up some dirt, most likely a wood chip from the bench. So I have to take it apart again, it has to be perfectly smooth.

After I re-fit the spindle, I have to adjust it with my micrometer to have a play of between 0.004 and 0.005 mm, no more, and no less, while being able to turn it by hand. Sounds like an interesting excercise which will take up more than a few minutes šŸ™‚

o_img_7613.jpgo_img_7617.jpgo_img_7618.jpgo_img_7620.jpg

Hardware, Workshop

Free Beanbag!

Posted on 2006-07-21 By rolfje No Comments on Free Beanbag!

When you are using a (digital) camera and need to place it on an uneven surface to keep it still long enough for your long shutter speeds, or you want to make a shot on the release timer (or both), you’ll need a tripod, or a beanbag. A beanbag is an ideal option, you can tuck it into your backpack, take it everywhere you need and it fits all camera’s.

Sure, you can buy a beanbag from a nice company like this, and spend about 30 euro’s or more. But, If you’ve got a needle, thread, a T-shirt or linnen bag, and some rice, you can make one for free!

Read More “Free Beanbag!” »

Hardware, Workshop

Pully party

Posted on 2006-04-01 By rolfje No Comments on Pully party

Party today! The rotor puller I ordered last month finally arrived after being in transit for over a MONTH, “thank you” United States Parcel Services! They probably sent somebody to swim accros the ocean with my parcel on his back. Judging by the shipping costs, the swimmer had enough food luxury during his trip. I really hope that Pit Posse selects a different shipping company for international orders soon. I took the torch and heated the rotor until water drops put on it boiled, to soften the retainer (lock tight) between the axle and the rotor. Then I re-tightened the rotor puller, smacked it with a hammer, re-tightened it, and so forth. The fifth hit did it, the rotor popped out. As you can see in the first picture, I had a fire extinguisher close by, because oil and fire do not play well together. I also used gloves so I could grab hot metal parts if needed, and I used aluminum plates to protect the magnet from direct heat of the torch.

Kawasaki KLR wrenching fanatics will notice the missing balancer chain tensioner (or “doohickey”, as they are sometimes called). Don’t worry, it’s still in one piece, I took it off to straighten it. It was bent and worn by the holding bolt, and I don’t want the bolt to sit or crawl to it’s former spot.

I also checked the valve fittings by putting petroleum in the head. They do not seem to be leaking, and show now signs of abnormal wear. Next week I will be checking the old oil for metal splinters, and putting it all together.

Workshop

How to replace the headlights on a Citroen Xsara

Posted on 2006-03-11 By rolfje 23 Comments on How to replace the headlights on a Citroen Xsara

Recently my left headlight broke. I thought I’d change it quickly, but after half an hour of fiddling I decided to ask my dealer to do it for me, while I was looking. That was not a bad idea. It turned out to be not so straightforward after all, and you actually need tools (which you don’t get when buying the car) to do this! This lead me to write a “small” article on how to replace the headlights of a Citroen Xsara. Enjoy.

Read More “How to replace the headlights on a Citroen Xsara” »

Hardware, Workshop

You Can’t Fix What You Don’t Measure

Posted on 2006-02-25 By rolfje 5 Comments on You Can’t Fix What You Don’t Measure

… maybe the title should be “Two Stupidities A Week”, but since both stupid actions had to do with measurement, or rather the lack thereof, let’s stick with the proverb.

Read More “You Can’t Fix What You Don’t Measure” »

Hardware, Workshop

Rotten Rotor

Posted on 2006-02-14 By rolfje No Comments on Rotten Rotor

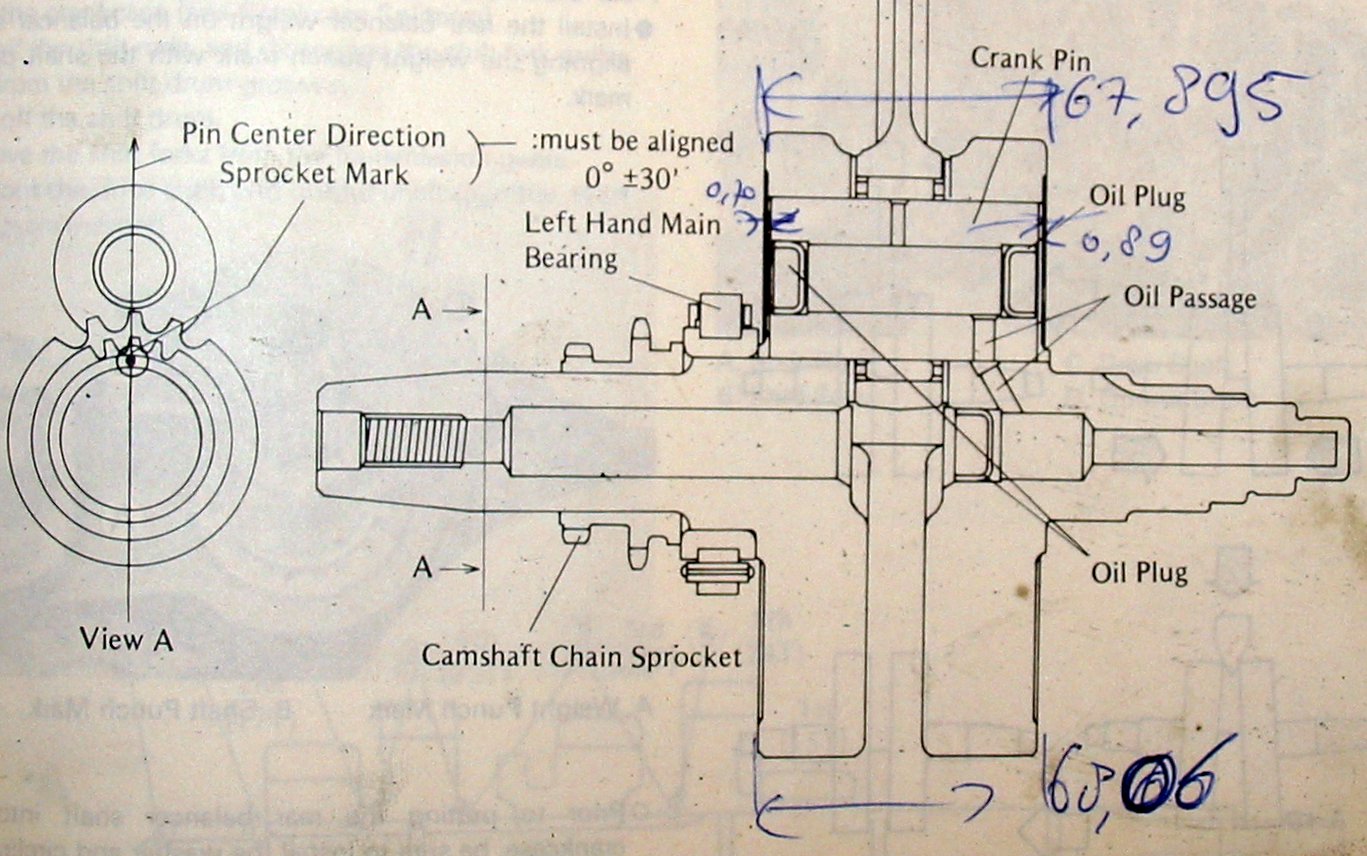
Kawasaki KL 650 Tengai crankshaft drawingLast week I tried to pull the rotor by using a rotor puller, and a socket (from a socket wrench set) to block it. The socket burried it’s way into the first thread of the crankshaft. After realising this, I tried to fit the rotor bolt, and it wouldn’t go in. Since only the first thread was damaged, I carefully drilled it out (only needed to go 2 mm deep), and now the rotor bolt fits nicely again.

Read More “Rotten Rotor” »

Hardware, Workshop

195Nm Victory!

Posted on 2006-02-07 By rolfje No Comments on 195Nm Victory!

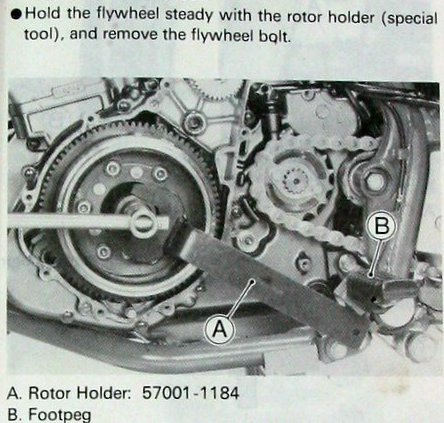
Kawasaki Rotor Holder (from workshop manual)For some strange reason, my brother’s Kawasaki KLR Tengai dead-stopped. After starting it again, it made some strange noises. It also had lost a lot of oil somewhere along the way, so we decided to not run it again before we found the cause of the trouble. A few weeks ago we encountered a funny problem, we couldn’t loosen the rotor-bolt. In the Kawasaki KLR workshop manual is a picture of a strange wrench to hold the rotor. Ofcourse we’re cheap, so we wouldn’t spring for a nifty and probably expensive Kawasaki specialty tool for a very old bike which not worth more than the petrol that’s in the tank (okay, okay, but you get the point).

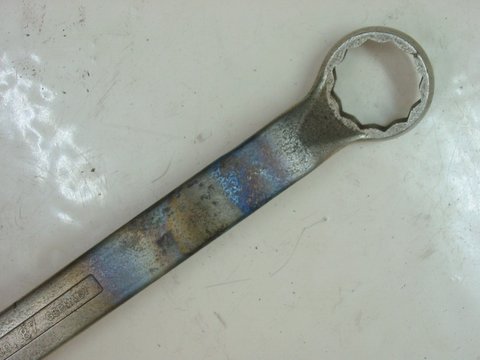
32mm wrench, colored from heatingThe rotor bolt is tightened to 195Nm. That’s a lot of force there, so it’s not surprising we couldn’t loosen it by holding the flywheeel with our hands. So we set out to create a tool of our own. We even ended up trying to bend an old 32mm Chrome-Vanadium wrench, which resulted in an empty gas can, a very hot workbench and nice colors on the wrench, without it bending even the slightest. We we barely able to heat it to the point it got red-hot, because the metal just conducts the heat away from the point you want to heat.

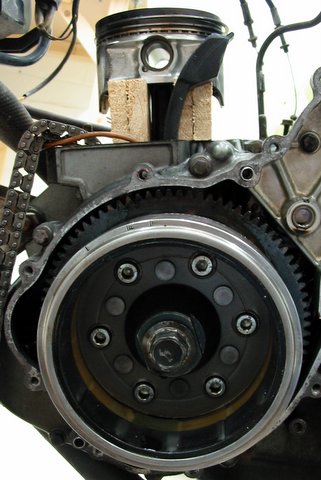
Holding the piston to loosen the rotor-bolt (overview)So I started mailing with Vincent, a good friend of mine which happens to be “quite handy” with motorbikes . He pointed out that you could also stop the rotor from turning by holding the piston. Because we wanted to measure the play in the bigend bearing we needed to remove the sleeve anyway, so I immediately went back to the workshop to do this. After removing the sleeve, I could easily make some wood pegs to block the piston. The wood would have to have a big surface and be strong enough to hould the piston, without damaging the piston or the engine casing.

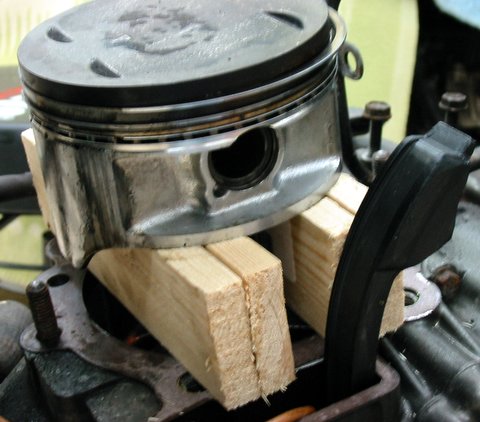
Holding the piston to loosen the rotor-bolt (detail)It turned out to work great! I needed to attach a long bar to the socket wrench to be able to apply enough force to the bolt, but in the end I got it! In the picture on the left you can see a detail of how the wood blocks are resting on the engine casing. After loosening the bolt, there was absolutely no visible damage to the piston or the engine. Even greater news is that there is also virtually no play on the bigend bearing, so we don’t have to disasemble the crank.

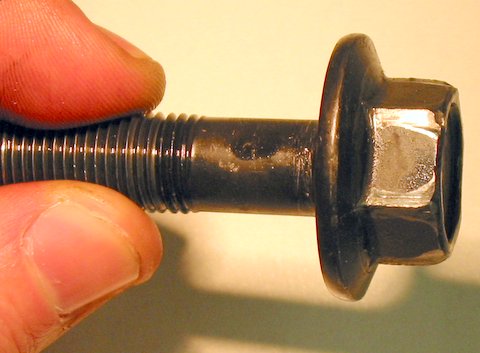
Wearmarks from applying 195Nm to theĀ boltWhen looking at the bolt, the results of applying so much force to the faces of the socket wrench become visible. We know for a fact that this bolt has been removed once before, so these wearmarks are from tightening and loosening the bolt just two times. I think we can tighten it one more time, but after that it needs to be replaced.

Hardware, Workshop

Brilliant Fluids

Posted on 2005-10-31 By rolfje No Comments on Brilliant Fluids

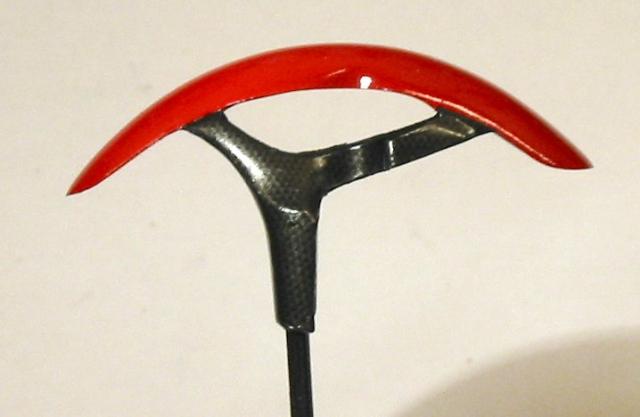
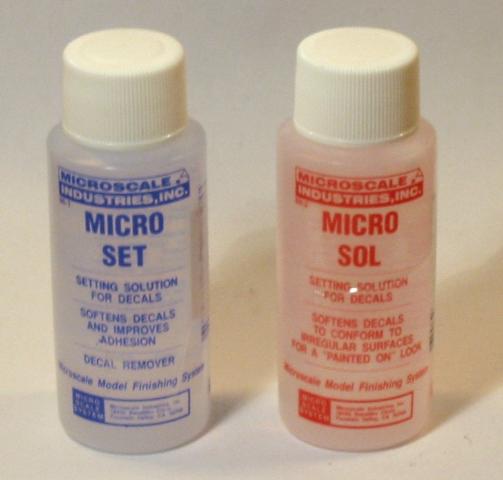
Patience has paid off! In stead of stripping the front fender from the terrible italeri decals, I left it as is, and started searching the web for solutions. I read some brilliant tips on the forms at www.modelbrouwes.nl, and went to the local model shop and bought some Microscale SET and SOL decal solutions.

Actually, de bottle labled “SOL” proved to be the most useful. After you applied the decal, and it is all dry (like my carbon fender struts), you gently apply the SOL fluid to the decal with a soft brush. As you may have guessed, SOL stands for “solution” and that’s what it does, it dissolves the decal slightly. The decal becomes so soft you can push and stretch it with the soft brush. Don’t overdo it, if the decal won’t go any further just let it dry, and try again tommorow. Sometimes it takes 2 to 3 tries.

The funny thing is that when the SOL fluid is applied, your decal may start to wrinkle. Ignore this. Just let it dry for a few hours (don’t touch it!) and it will straighten out. Really great stuf!

The SET fluid smells like vinigar, and you are supposed to apply it to the model before you put the decal on. I have tried it, but I haven’t seen the benefits of it yet. Maybe the SET fluid de-greases the surface a bit, but since I keep the surfaces clean anyway, it won’t do much for me I guess. I have a lot more twisty and lumpy carbon parts to do, so maybe I’ll get back at this…

Workshop

Exhausts Airbrushed

Posted on 2005-10-25 By rolfje No Comments on Exhausts Airbrushed

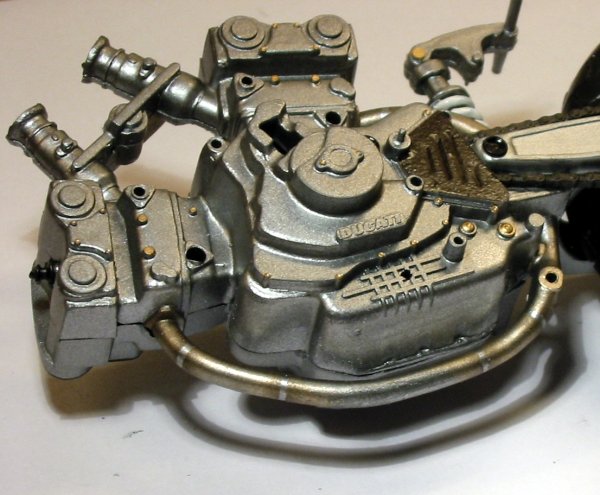
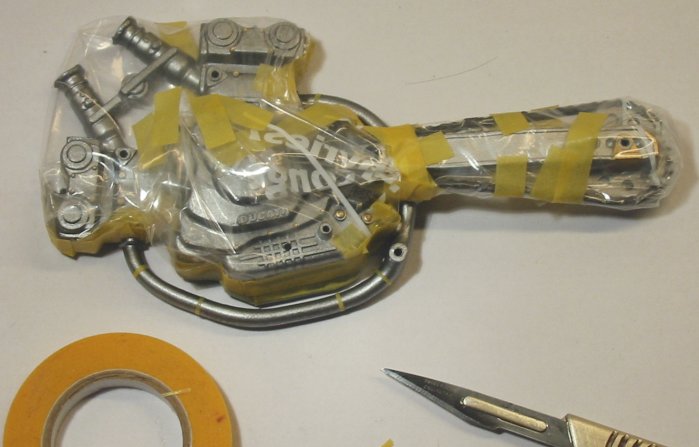
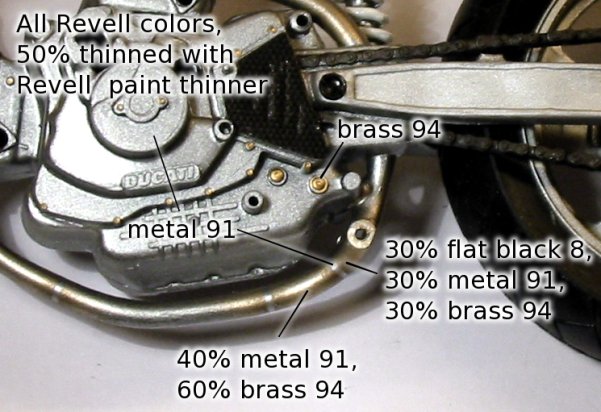
After a lot of masking, lot of paint-mixing, and very little airbrushing, this is the result of my airbrush adventure to make the exhaust pipes look more realistic. I smuggled a bit, because normally exhausts are welded out of several bended pipes, to get the desired curve. The welds are allways on a spot where two bends meet. In this case, the welds are on random positions, and because I don’t have a very acurate airbrush (rigid needle), they are seperated a bit more than normally. By doing it like this I can make the 3 gradients I wanted from metal to dark bronze-like oxidated metal.

It may be not competely realistic, but it sure beats my normal pencil-only paintjobs! For the observant reader: Yes, that’s another yucki Italeri decal on the engine side cover which is supposed to look like a carbon part with slots in it. The thick Italery decal can not follow the detail of the slots. I still haven’t got the micro set fluid which could solve this (from hear-say). More on that later this week I guess, when I have time to stop by the local modelling shop to see if they have it in store.

I also notice that it seems to be harder to get the larger models more realistic. Small models are easier because at some point, you simply can’t add more detail, and it will look good. I built my first ducati in less time, without an airbrush, and it looks quite nice. I think I’ll stick with the smaller models from now on. Shorter build time, takes up less storage space, are (very) cheap and fun to do.

Workshop

Milling aluminum housing

Posted on 2004-11-14 By rolfje No Comments on Milling aluminum housing

Today I found the first good use for the milling machine. I had this cast aluminum housing for an electronics project, with ridges on the inside. I made a hole for a connector in it, but I never got the nut on the inside flat to the surface because of the ridges on the inside of the housing. I decided to use the mill to flatten the surface on the inside of the housing. The housing did not fit in the clamp, so I had to find a way to get it attached to the bed of the mill in a different way. I took a piece of wood, drilled two holes in it and bolted that to the bed of the mill. Then, I used long plywood screws and another piece of wood to hold the housing. In the picture on the right you can see this construction. I used a test indicator to align the house to the X-axis of the bed.

Since I only needed a plane large enough to place a ring and nut on, I roughly adjusted the 6mm mill to just not touch the bottom of the housing. I milled down to the point where the ridges were not visible. The image on the left is the result of the work. The mill is a very nice tool to adjust ready-made electronics housing to your likings.

Hardware, Racing, Workshop

Posts navigation

Previous 1 2 3 Next
         

Recent Comments

  • rolfje on European alternatives to AWS/Azure/GoogleCloud
  • rolfje on Are you de-skilling?
  • rolfje on Are you de-skilling?
  • rolfje on Exit WordPress
  • Guus on Exit WordPress

Tags

Apple backup design DIY DRM eclipse environment fix Fun Garmin gmail google hacking hamradio Hardware helicopter iphone ipod iTunes Java Kawasaki Keynote linux modelling motorcycle music news opinion oracle osx photo photography programming repair review security Software technology Time Machine Ubuntu usability Utilities vacation windows Workshop

Categories

  • Apple (107)
  • Divorce (1)
  • Electronics (4)
  • Fun (57)
  • Games (7)
  • Hardware (73)
  • Microsoft (18)
  • Racing (16)
  • Software (143)
  • Uncategorized (68)
  • Workshop (22)

Archives

Brought to you without adds, banners, cookies or tracking. This one is on me. Yes, life can be this good. Pay it forward.

Copyright © 2026 www.rolfje.com.

Powered by PressBook WordPress theme