 In their infinite wisdom and search for an affordable quality infotainment and navigation, Volkswagen partnered with Garmin. That would nog have been a big disaster, but in their search for a budget solution they put the standard Garmin/Navigon screens on a little arm that protrudes out of the dashboard not unlike a scene from the movie “Alien”. If you have an (otherwise fine) Volkswagen Up!, e-Up!, Skoda Citigo, or Seat Mii (which are basically the same cars), see how I converted a Garmin holder into a proper Magsafe adapter, holding your phone and charge it without extra wires running over your dashboard.
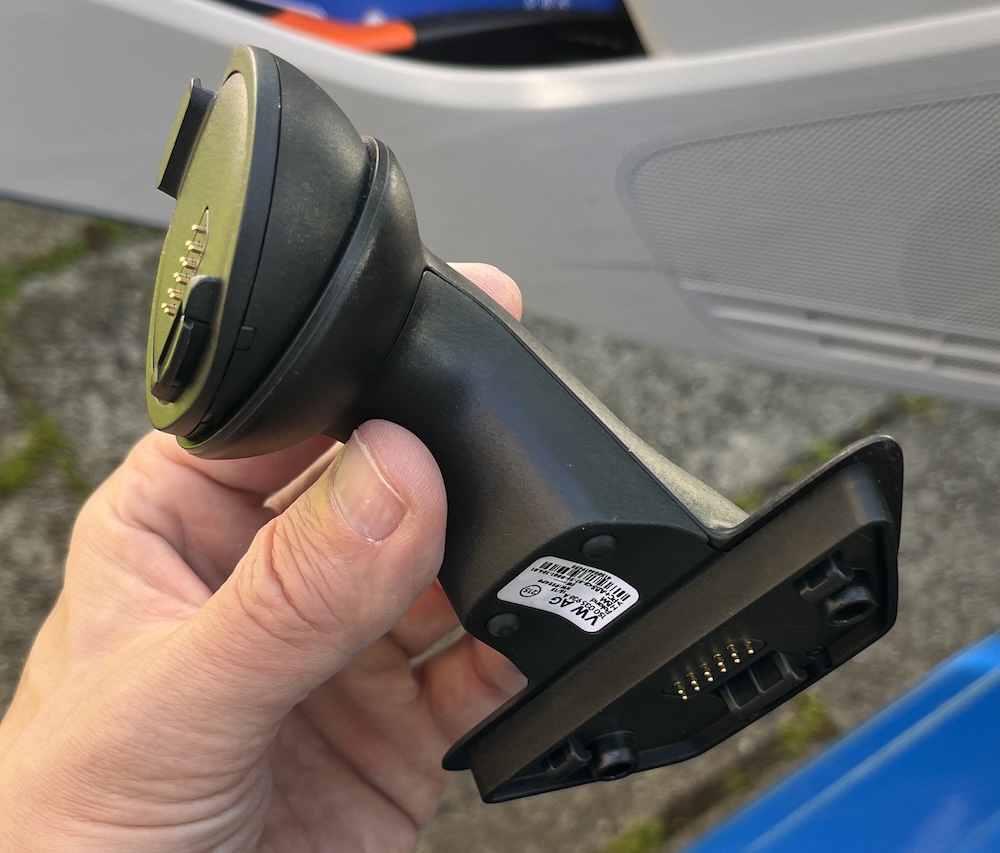
Step 1: Make sure we are talking about the same thing 🙂
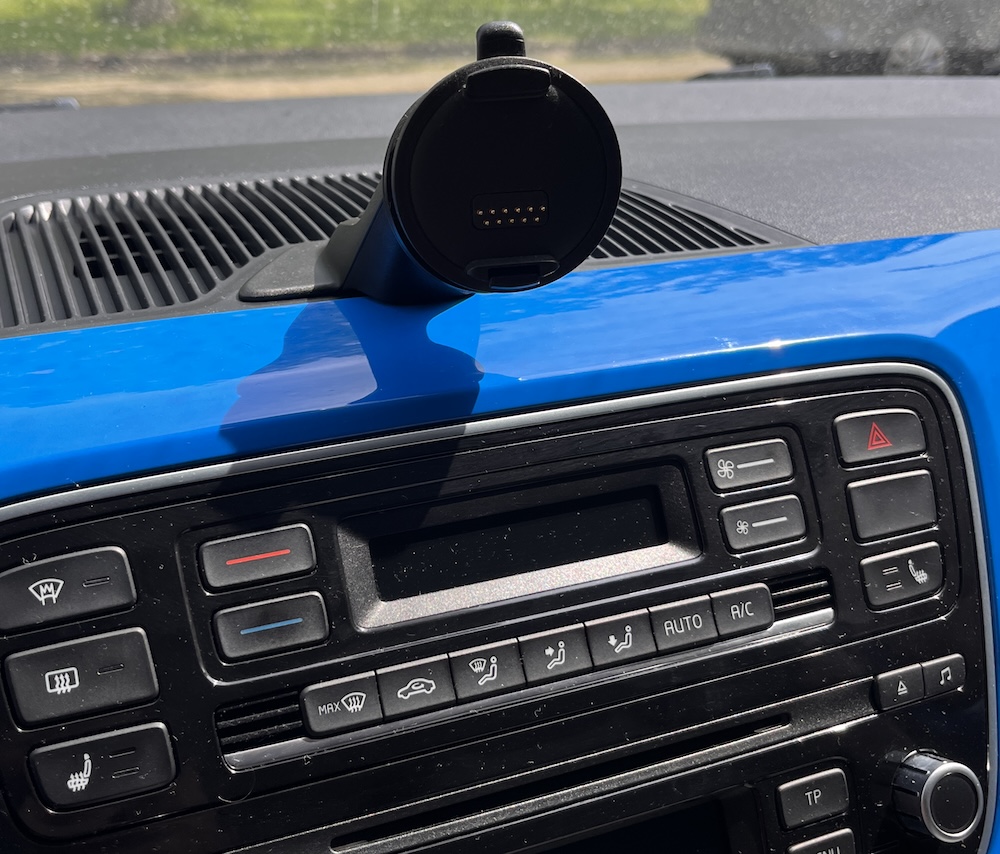
This is the mount. You can choose to take your original mount apart, but please order a second hand mount so that you can go back to the original screen if needed. Even second hand, the mount is pretty expensive for a piece of plastic with visible damage on it. The original mount stayed untouched, you need it to change settings on the car.
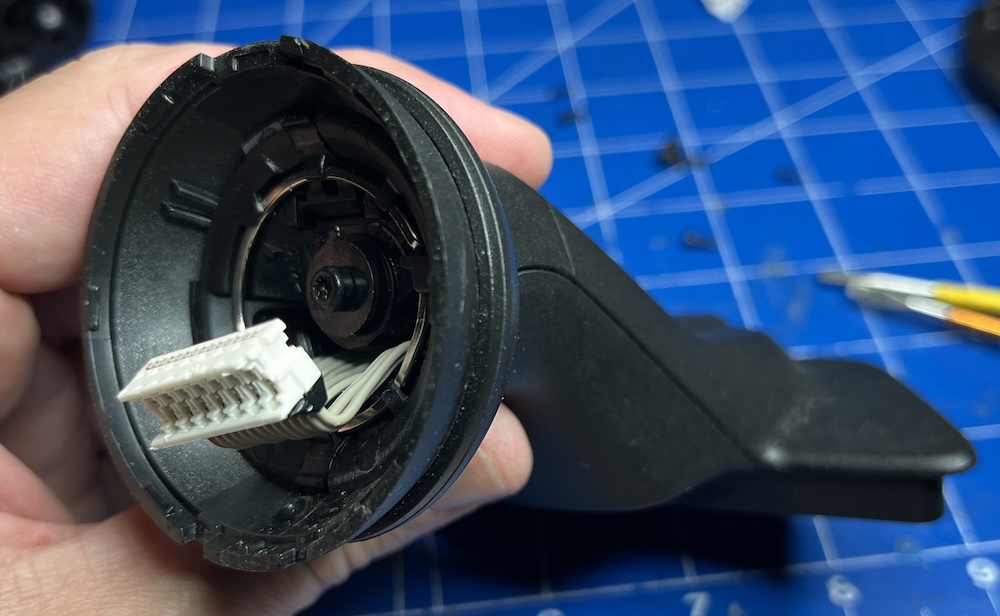
Step 2: Remove the front
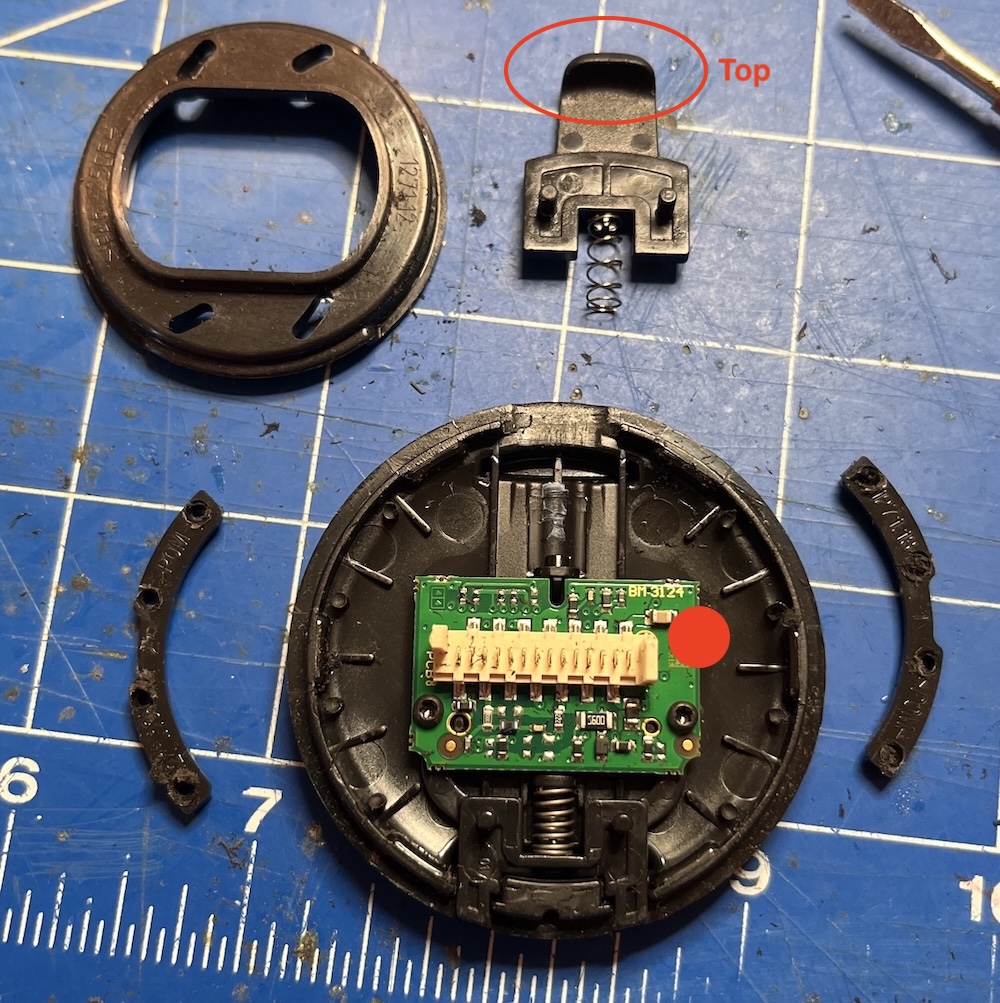
The round plastic plate holding the Garmin connector can be removed by carefully getting between that plate and the half-round ball that it is attached to. This part is just clicked into place, it is not glued. Make sure you don’t pull too hard, there is a ribbon cable behind it that you don’t want to break.
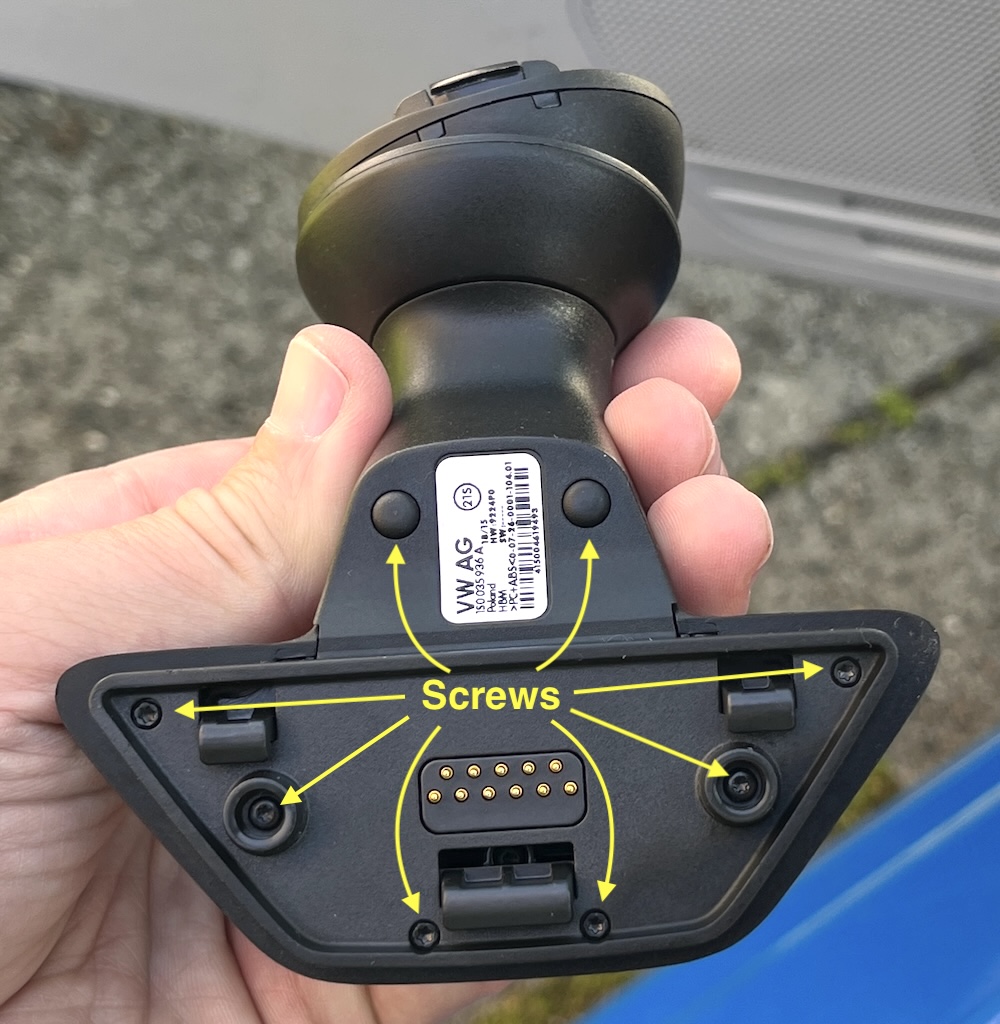
Step 3: Find the screws (two are hidden)
Make sure that you keep track of which screw goes where, they are not all the same size. After removing the screws, the bottom will still be stuck. It is glued to the base. Carefully pry it loose with a thin screwdriver or knife, be careful not to cut yourself.
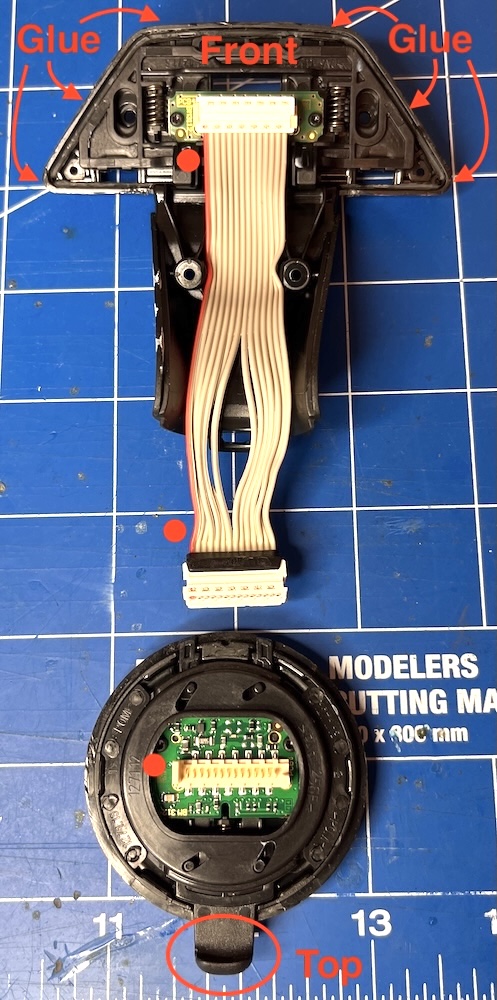
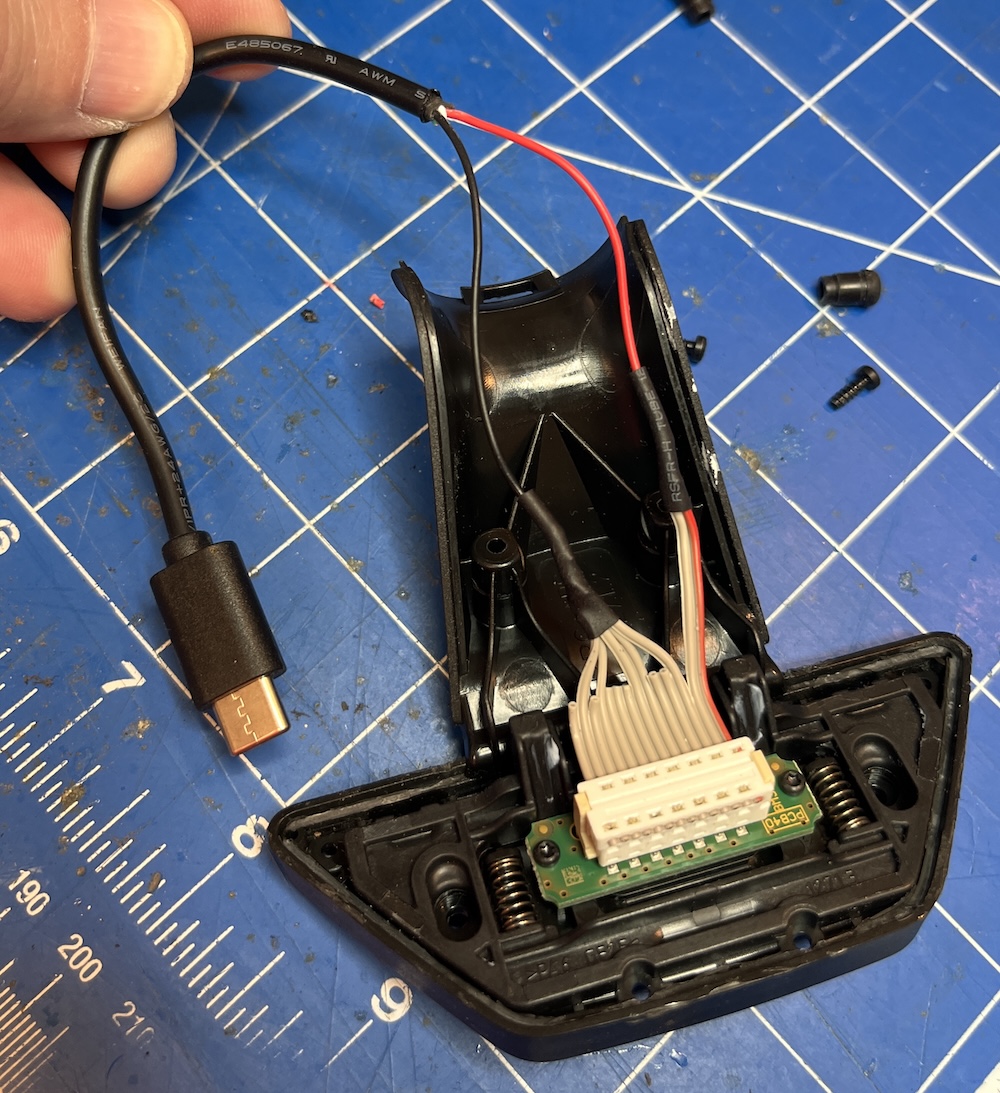
The image below shows the ribbon cable, where pin 1 is, and where the mount was (was) glued:
Step 4: Take the front plate apart
The front plate has two plastic bars that are resting on pins and melted into place. Find the molten pins (4 on each side) and drill or cut them so you can remove the two side bars (look at the image to spot them). You can un-screw the green PCB, which will give you a nice hole to poke your USB cable through.
Step 5: Cut the ribbon cable
Here you see the wiring as I found it on the Garmin mount. I listed only the Ground and +5V pins. The pins are connected together, so there are 2 pins carrying 5V and 3 pins carrying Gnd (5 on the ribbon cable).
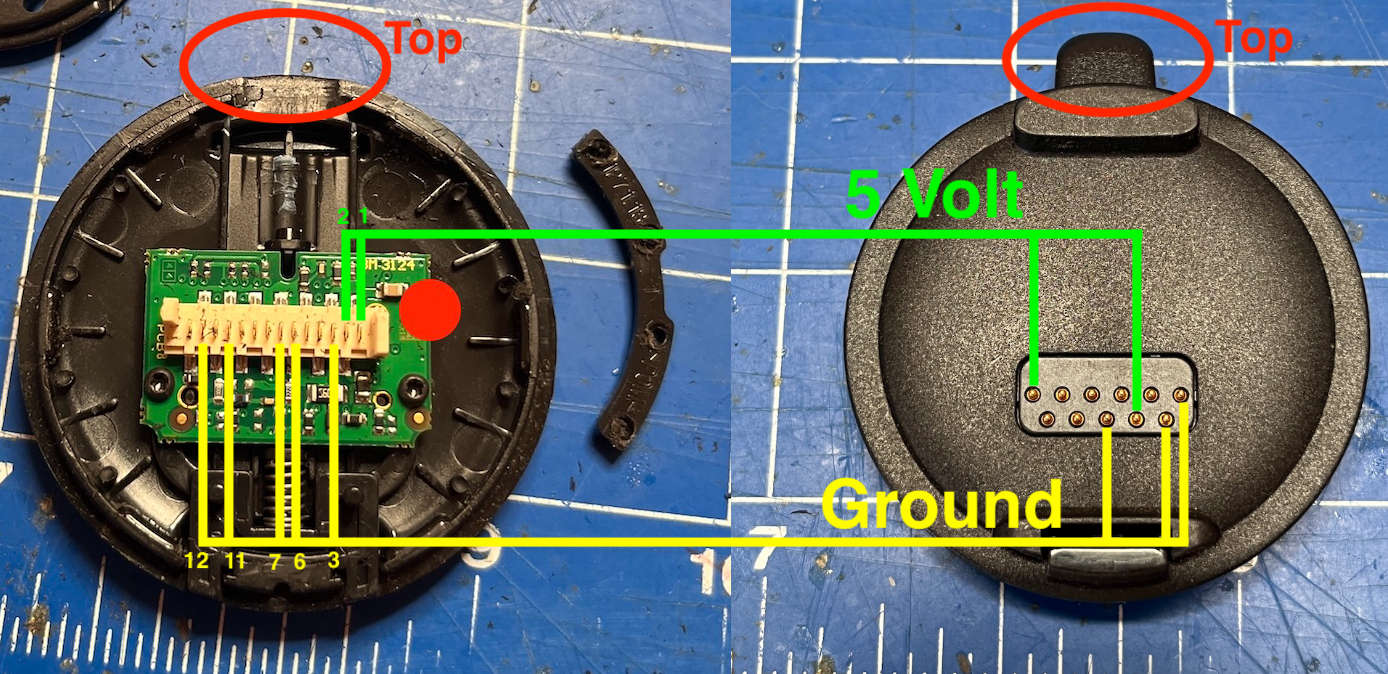
With this information you can cut the ribbon cable. The 5V and Gnd wires stay long, the rest can be made shorter. Make sure you keep an eye on the red side of the ribbon, and the red dots in my images. Start counting from the red dot/wire, this is pin 1.
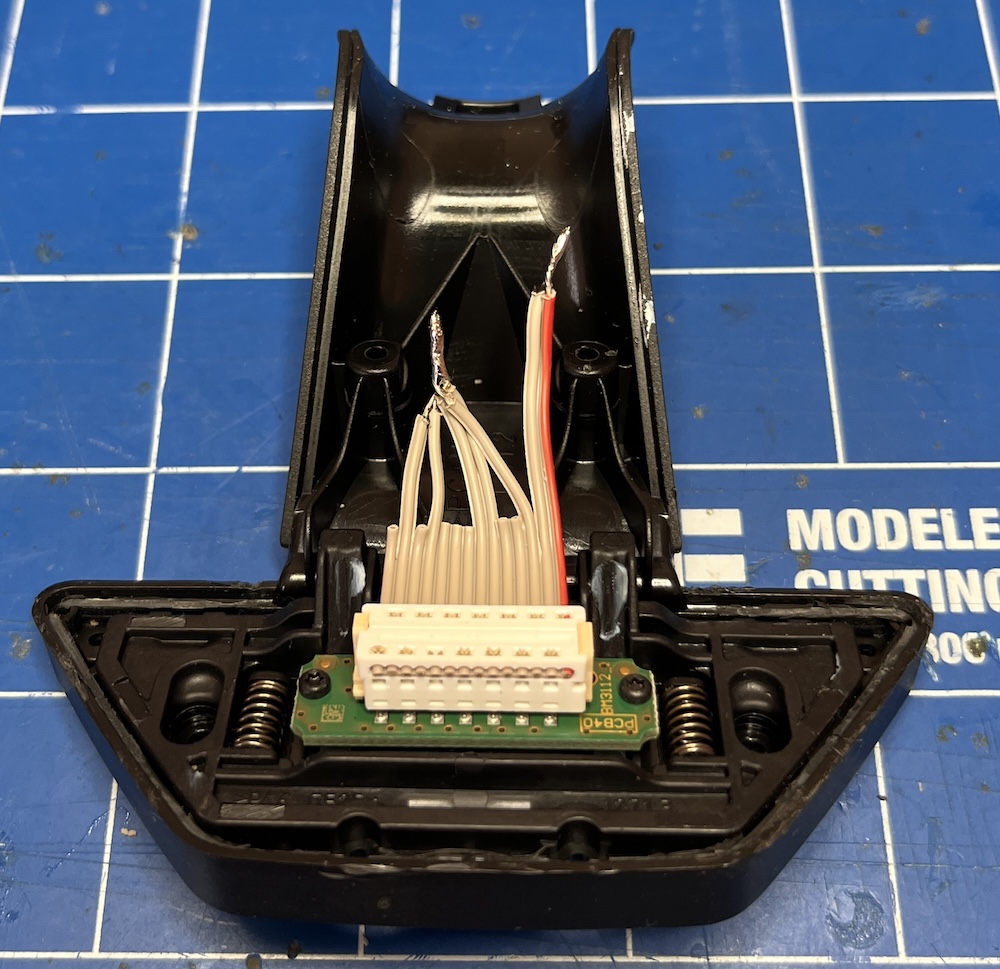
Step 6: Attach a USB connector
I used a USB-A to USB-C cable and cut it in 2. That way I could put the USB-A connector in a USB adapter to find out which colors in wire are + and -. Luckily it was red and black as you would expect, but sometimes it is different, so always measure first. While you are measuring, now is also a good time to walk to the car and measure the voltages on the ribbon cable to make sure you have selected the correct wires.
Now we know the colors, the numbering and the voltages, you can connect the USB-C connector to the ribbon cable. Use shrinkwrap to make it nice.
Step 7: Glue and snap!
This is where I forgot to take pictures, sorry, but if you are this far, you can probably guess what’s next: Glue the Magsafe charger to the front of the round plate, thread the USB cable through the hole where the Garmin connector used to be.
After you glued the magsafe, you can put it in place by pushing the round plate back in its position. This will be a bit fiddly as the joint will start to move. Be patient. Then screw the bottom back in place with the correct screws in the correct places (no glue here).
Step 8: Results
Put the mount in its place and enjoy your magsafe. This is what it looked like with the original Garmin plate:
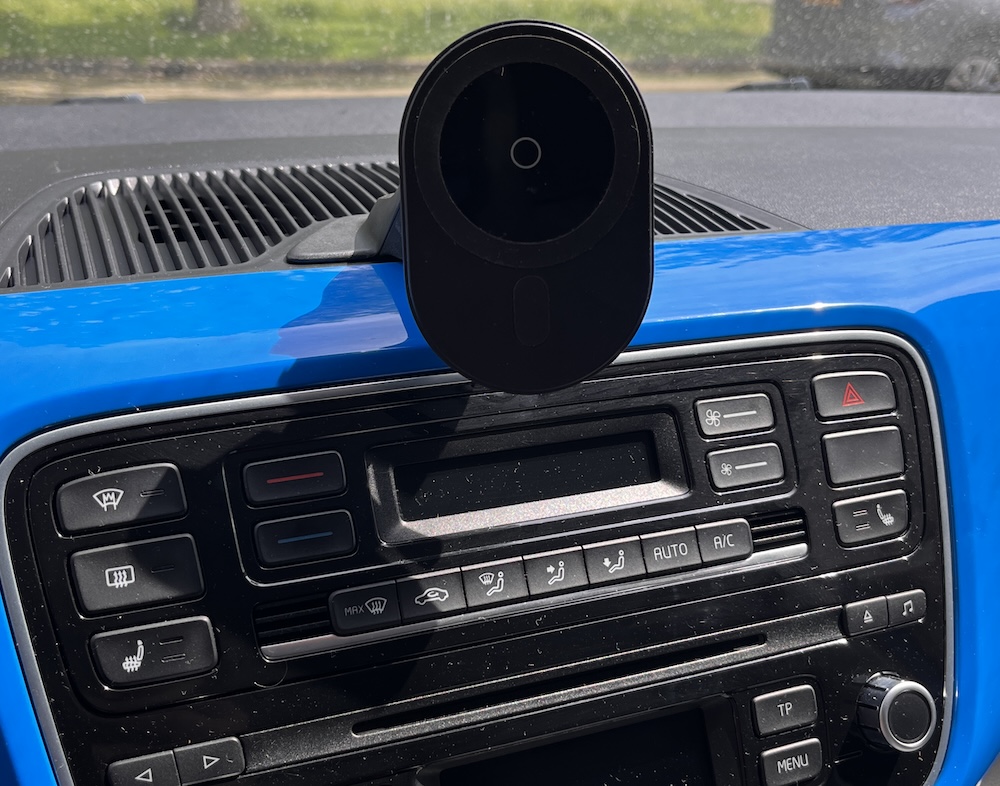
This is what it looks like with the magsafe on it:
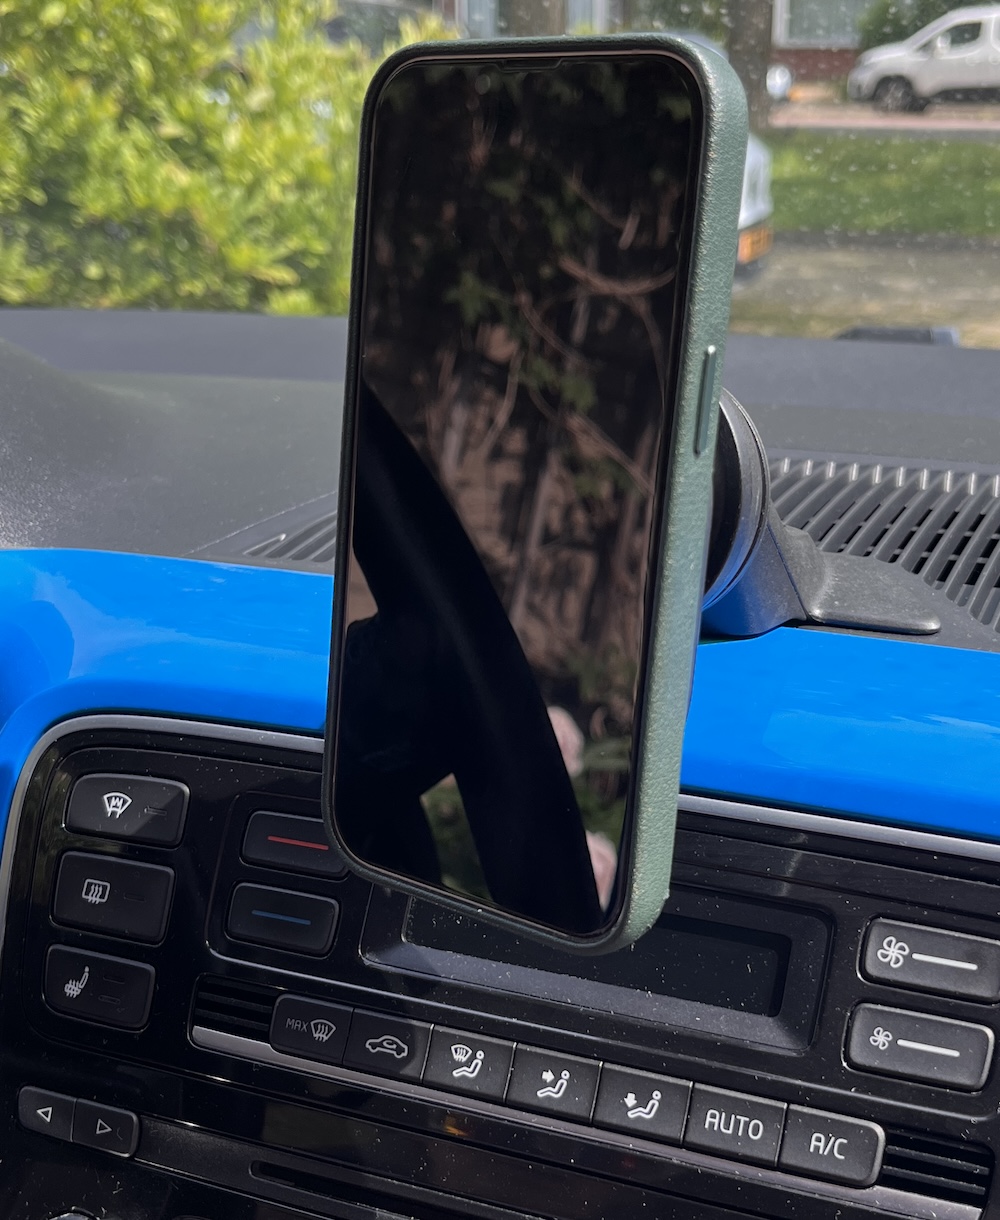
This is what it looks like with an iPhone in it. No wire mess, and pretty sturdy.
One note: Since this USB-C connector connects to a simple 5V pin of the car, it has no way to negotiate with a charger to be able to start charging faster or at a different voltage. So your phone will charge, but not at an incredible pace. Besides, you will probably have the screen on for navigation, so don’t expect wonders.
I hope this makes your daily commute a bit more pleasant, cheers!